Installing a Dry-Fit, Wood Burning Outdoor Fire Pit
0 Comments | Posted by armchairbuilder in Great Products
Guest Post by Sean Burke
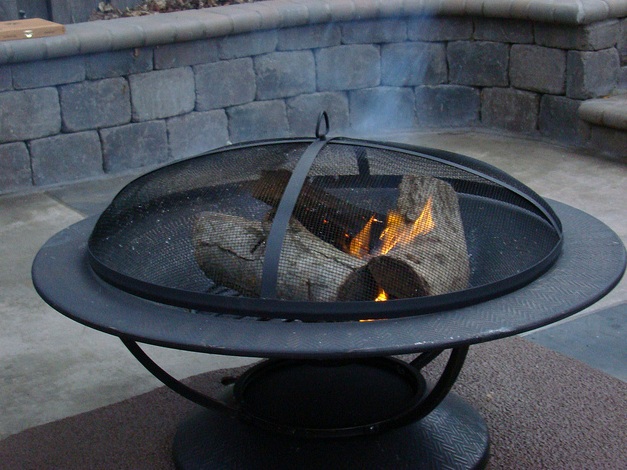
Some people say we build fire pits to satisfy our primal urges to sit around a crackling fire and gaze up at the heavens like our ancestors did. Personally, I’m only in it for the s’mores. A fire pit is a great addition to your backyard, especially if you love entertaining company or if you’d simply like to get the family together away from the television.
I’ll take you through the construction of a dry-fit mason ring fire pit, which means you won’t be using mortar. This makes for a very easy do-it-yourself project, however a more advanced builder may construct theirs with mortar if they are so inclined.
1. Do your homework.
Like with many construction projects, check with both your homeowner’s association and your local city ordinances to make sure that you can actually build a fire pit, and if so, what restrictions apply. Pay strict attention to distances to structures that you must adhere to. Once you know that you can build a fire pit, you’ll want to buy concrete blocks, and a fire pit bowl or fire bricks to line the inside of your fire pit.
2. Determine the fire pit location.
You should find a location where a fireproof foundation already exists, such as dirt, gravel or a patio. You can also construct your own. Do not build a fire pit on a wood deck! You will also want to check for prevailing wind conditions by planting a flag at prospective fire pit locations. Over a couple of days, check to make sure your fire pit location won’t have smoke blowing into your home.
3. (Optional) Build your fire pit foundation.
This step is only needed if you don’t have a fireproof location to build your fire pit. If you have a fire pit bowl, use the lid to lay out the foundation area. Drive a stake into the ground at the center of your fire pit, and then lay the lid of the bowl centered over the stake. Set your concrete block on the outside of the lid. Remove the lid (leave the block) and take a piece of string from the stake to the outer edge of the block. Use this radius to spray paint the outer diameter of your fire pit. At this time, you may wish to also mark off a 12 foot diameter for a seating area (see step 5). Dig a 6 inch deep circular pit. Follow the manufacturer’s instructions for mixing and pouring quick setting concrete. Make sure the foundation is level and smooth. If you don’t have a fire pit bowl, then you can choose the diameter of your fire pit and follow the same steps for creating a foundation.
4. Lay down your fire pit walls.
If you have a fire pit bowl, place it’s lid at the center of your fire pit location. Begin stacking your blocks around the outside of the lid. Make sure you that you stack them tightly together. Once the bottom layer is finished, remove the lid from the center. Begin stacking the next layer, staggering the blocks like you would with a brick wall. Continue this until your pit has reached the desire height. Install the fire pit bowl on top of your ring. If you do not have a fire pit bowl, stack your blocks at the desired radius and continue the layers as directed above. On the inside of your pit, stack fire bricks vertically to create a fireproof barrier.
5. (Optional) Construct your seating area.
If you don’t have a fireproof area around your fire pit, you can install one. Mark off a 12 foot diameter area around your fire pit. Dig out the grass or dirt and lay down landscape cloth. Then fill that area with gravel.
Congratulations! You’re now ready to place some patio chairs around your pit and get a fire started!
About the Author
Sean Burke is a home renovation enthusiast and writer specializing in a variety of DIY topics. His love for outdoor fire pits is rivaled only by his passion for interior design and remodeling! If you are looking for great outdoor furniture and fire pits for your patio, be sure to visit Sean’s site, Patio Productions, here.


