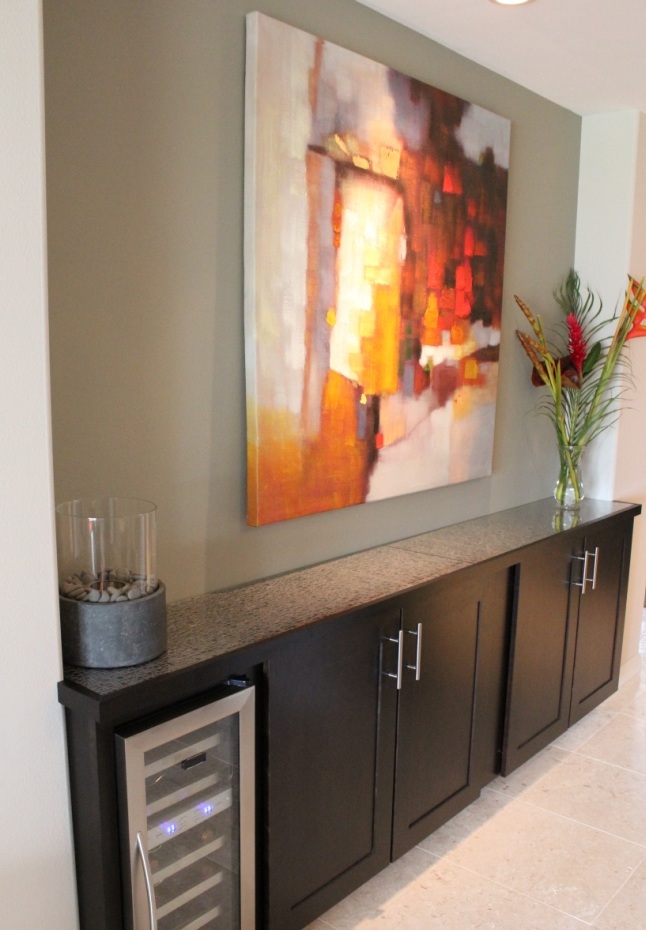
How would you like to add a new wine bar that fits perfectly into your home? It’s totally possible to create a great custom look without spending a fortune. Here we share with you our latest project along with some tips for planning your new built-in wine bar.
Wine Chiller
The actual wine chiller (a.k.a. wine cooler or refrigerator) is one of the biggest costs for a new wine bar. But what if we told you it was possible to save big money on this unit with a little planning? You have two major options when it comes to wine chiller models…1) Freestanding, 2) Under cabinet/Built-in. Under cabinet units have a special cooling system that let you completely enclose them on all sides and rear. This is necessary if you are installing in a typical bank of cabinets. The biggest problem with these under cabinet models is the high price. They can be three to four times the price of a freestanding model.
So if you can come up with a way to use a freestanding unit, like we did in our latest project, you can save big money. We found a freestanding model that needed four inches of clearance around it in order to vent properly. Because we could design the bar around this requirement, we knew it was possible, especially when the potential savings were over five hundred bucks. Be sure to check with the manufacturer of the chiller prior to purchasing to fully understand the venting clearances required. If you don’t provide the right venting clearances, the wine chiller won’t cool properly.
The other major question regarding the wine chiller is whether to go with a single or dual zone model. A dual zone allows you to store both red and white wine in the chiller at the same time at two different temperatures. This is perfect if you like to keep both reds and whites on hand for guests. As my wife gladly pointed out, red and white wine are typically kept at different temperatures for serving.
Wine Bar Location
The best thing about creating a new wine bar is the ability to design it to fit your space exactly. In our latest project there was wasted space in the kitchen between two columns that was perfect for a built-in wine bar. Sure, a piece of furniture could have been purchased, but it would never have fit the space as efficiently.
Because the typical wine chiller unit is a minimum of twenty inches from front to back, you may decide to recess the unit into the wall. The best way to do this is either into a stairway dead space or into a closet. In many cases, stairs have an unused area under them which will create a great location to recess your chiller into.
For our project, we placed the chiller so that it backed into a laundry closet. This allowed us to ventilate the unit from the backside and save floor space in the wine bar design by minimizing the overall depth.
Layout
Now that you know the location and the wine chiller dimensions and venting requirements, you can come up with a design and cabinet layout. A really inexpensive and easy way to do this is with graph paper. Grab some graph paper, create a scale, say four blocks equal a foot, and put pencil to paper. Some key things to include in your design are…
- Length of bar – Be sure to include the appropriate venting space for the chiller.
- Height of countertop – Typical countertop height is 36 inches…but that’s only a guide.
- Depth of bar – Your chiller will dictate the minimum depth of the bar…if it can be recessed, this will make the design more compact
- Cabinet sizes and quantities along with any fillers needed- You will save money by going with production cabinets in standard sizes. We chose a wall cabinet (12″ deep) to save floor space.
- Toe Kick – If you go with a wall cabinet, you may want to create a custom toe kick to keep a look similar to the rest of your cabinets.
- Countertop – Include the material, edge, and overhang details.
- Power Source – If installing along an existing wall, there should be a plug already there. If not, you may need to add one.
Save 80% on Countertop
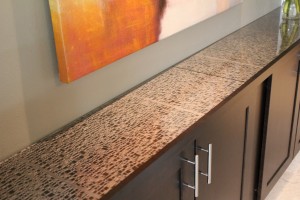
Of course you could go with one of the traditional countertop choices of granite, solid surface or laminate. But there’s another option that can save you hundreds of dollars and give you a custom look that’s not see very often. By combining plywood, stain, cabinet trim and glass, you will get a unique look, without the high price of stone.
With a little planning, you can install your new custom wine bar at an affordable price. Check out our wine bar planning video and stay tuned as we have another video coming next week showing the actual installation.


