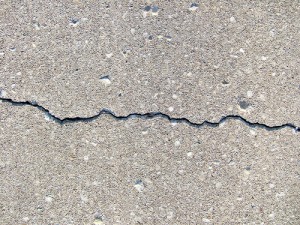
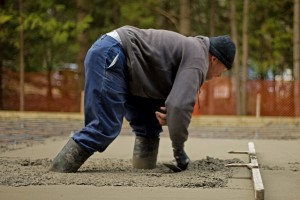
There is a good article in FineHomebuilding that explores properly finishing concrete. The article, Broom-Finished Concrete Flat work, reviews most of the requirements for the proper placement and finishing of concrete. The biggest item missing is the proper way to cure the concrete. I have found that most professional concrete finishers are great at placing and finishing, but not so good at curing. Without proper curing, the concrete surface will be prone to flaking and scaling.
What is proper curing of concrete? Have you ever paid attention to bridge construction projects when you are driving down the highway? You typically have plenty of time to check out what they are doing as you sit in traffic at construction projects. When they are finished paving a section of bridge, they typically cover it with burlap and plastic and apply water to it with sprinklers. The sprinklers add the moisture and the burlap/plastic keep it from evaporating or running off. This is a relatively low-tech process that has been used for years. The Portland Cement Association explains curing this way: “Curing is one of the most important steps in concrete construction, because proper curing greatly increases concrete strength and durability. Concrete hardens as a result of hydration: the chemical reaction between cement and water. However, hydration occurs only if water is available and if the concrete’s temperature stays within a suitable range. During the curing period, from five to seven days after the placement of conventional concrete, the concrete needs to be kept moist to permit the hydration process. New concrete can be kept wet with soaking hoses, sprinklers and covered with curing blankets or can be coated with commercially available curing compounds which seal in moisture.”
What do bridges have to do with the concrete at my home? When it costs tens of millions of dollars to build a new bridge, we are extremely motivated to create a product that will last. So, rather than take a chance as to whether the concrete will last, commercial bridge building companies employ all of the best techniques that modern science has given us. Bridges are subjected to extreme conditions of all kinds including heavy moving loads, harsh chemicals, and considerable weather/temperature fluctuations. Your home’s concrete can be subjected to many of these same conditions. You may not place deicers on your driveway, but they will get on the undercarriage of your car and fall off as you drive up to your garage. The local city salt truck will also inadvertently spread salt up from the road onto your driveway.
What is the Best Way to Cure My Concrete? As a home builder, I don’t have the resources needed to cover all of my new concrete with burlap, plastic and water for the first week after pouring. So in order to properly cure the concrete, I have my concrete contractor apply what they call a cure-n-seal product just after finishing. This product traps the moisture in the concrete so the material properly cures. This is especially necessary on windy, warm sunny days. There is an extra cost to apply the product, but most of the concrete subcontractors I have worked with will apply the cure-n-seal at no charge as long as I pay for the product. It saves them from having to deal with service issues associated with deteriorating concrete. Another tip for placement…make sure your concrete company places the concrete early in the morning during the summer months when mid-day temperatures tend to get hot. Ideally, your concrete will be finished and sealed before the hot part of the day.
Concrete Maintainance As a homeowner, you will still want to apply a good quality sealer to your concrete every year if it is subjected to harsh chemicals of any kind. The sealer will help keep deicers, anti-freeze, gasoline and other chemicals from getting to the surface. Most of these sealers can be rolled on with a paint roller or sprayed.
With proper placement, curing and maintenance, you new concrete will last for the lifetime of your project. If you have other common problems with your home that you can’t seem to get fixed, check out our Troubleshooting Guide at our Estore. This guide walks you through the diagnosis of common home issues and provides cost effective solutions.
2 Comments for Creating Concrete That Lasts
Install Masonry and Siding. Step 41 in our How to Build a Home Series- Armchair Builder :: Blog :: Build, renovate, & repair your own home. Save money as an owner-builder. | June 10, 2013 at 8:40 am
Driveway Paving - Armchair Builder :: Blog :: Build, renovate, & repair your own home. Save money as an owner-builder.- Armchair Builder :: Blog :: Build, renovate, & repair your own home. Save money as an owner-builder. | July 18, 2013 at 9:36 am
[…] For information about concrete quality installation, check out our previous article, Creating Concrete That Lasts. […]


[…] the brick. So it makes sense to install masonry, at least brick, prior to pouring any adjacent concrete porch slabs. Porch at Front of […]