How to Install a Glass Tile Backsplash
8 Comments | Posted by armchairbuilder in Cool Design, Kitchen Remodel
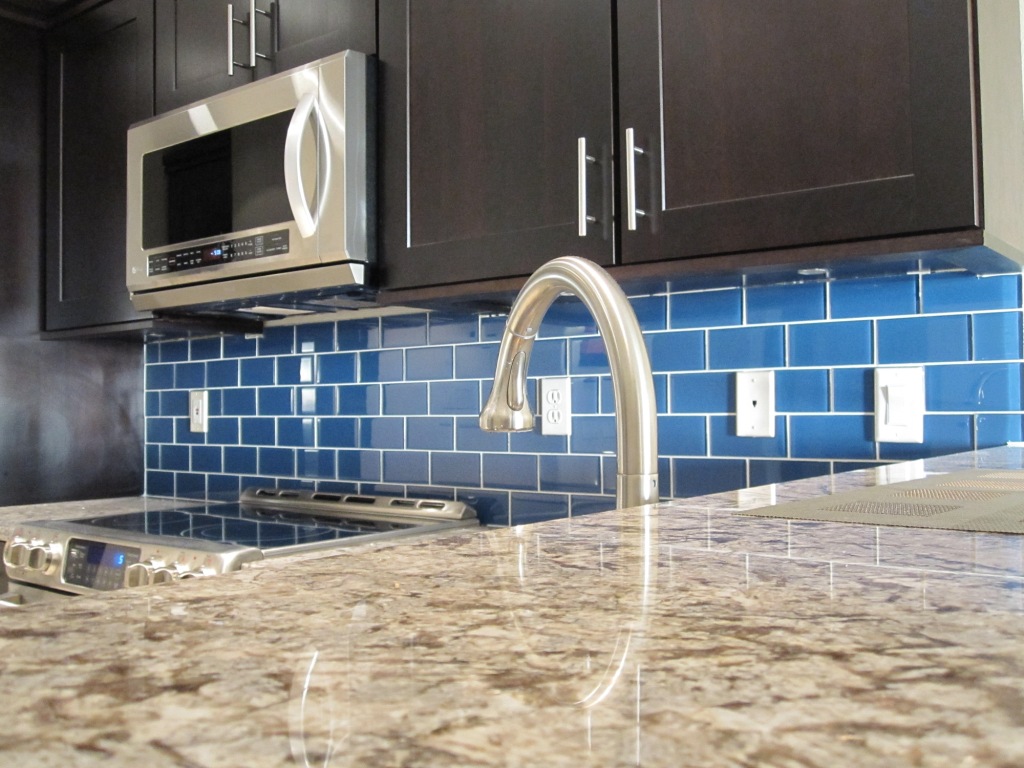
One of the easiest ways to give your kitchen a new, custom look is to install a glass tile backsplash. But how do you install a glass tile backsplash? For our new kitchen, we have decided to use a horizontal 3″x6″ glass subway tile to provide a clean, modern look. Let’s take a look at how to install a quality glass subway tile backsplash that will last for years to come.
Repair Drywall: When talking about how to install a tile backsplash, we need to discuss the substrate material. It’s important to have a solid backer for your new tile. If you have removed old tiles, you will most likely need to repair some drywall areas that have been pulled apart as the tile mortar was removed. Make sure that the entire surface is solid…you don’t want any flex in the wall as this will cause your grout to crack (and possibly your tiles).
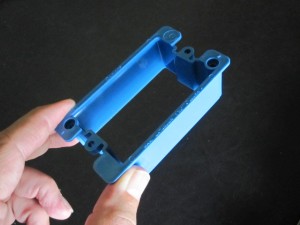
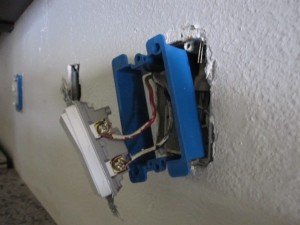
Electrical Box Extensions: We are talking about how to install a glass tile backsplash… so why do we need electrical box extensions? Your new tile has a thickness to it…so you will need to adjust the electrical boxes if you are installing tile for the first time. Extensions can be found at any hardware store for a dollar or two and can be installed in just a few minutes. If you decide to save a few bucks and install these yourself, make sure you turn off the power to the outlets and switches prior to installing. You should also check with your local building department prior to installing to make sure these are allowed per your local code.
Prime Wall: When I give tips on how to install a glass tile backsplash, I always mention the need to prime the wall. If you go with a translucent glass tile, be sure to prime the wall white prior to installation. This provides added protection against bleed through of markings or old paint. Thinset mortar should cover the entire area behind the tile, but there is a chance a small spot could be missed. And if a spot is missed, it’s best to have a white wall behind the translucent tile. This is just an extra quality step I picked up from an installer friend of mine when discussing the details of how to install a glass tile backsplash.
White Thinset Mortar: Make sure your installer uses a white thinset mortar to adhere your glass tile to the wall. This will prevent the mortar color from affecting your tile color. For example, if a grey thinset is used, your tiles will end up looking darker than the sample. Again, this is just a precautionary measure that we always include in our tips on how to install a glass tile backsplash.
Butter Tiles: Include in your contract with your tile installer to apply thinset in an even coat to the back of each tile before setting. The tile mortar is applied to the wall and then grooves are applied with a “V” trowel. By applying a thin, even coat of mortar to the back of each tile before setting, you will prevent the grooves from showing through your new glass tile.
Glass Diamond Blade: You will also want to include a note in your scopes of work and specifications for your tile installer to use a special glass tile blade for the wet saw. Don’t allow them to use a standard wet saw blade. They make diamond blades specifically for glass that will help minimize your waste and bad cuts.
Non-Sanded Grout: Also make sure your installer uses a non-sanded grout for your glass tile installation. If he uses a sanded grout, the face of your tiles will get scratched as the grout applicator moves across the surface. Scratches on your gorgeous new tile will take away from the sleek, new look.
Leave Space for Future Changes: For my tile backsplash projects, I like to leave a small space under the microwave or rangehood just in case we need to remove it in the future. If the tile is run right up to the edge of the bottom of the unit, it will be difficult to remove without damaging the tile. Even if you have no intentions of removing your new appliance, you still may have a service issue that will require removal. If you must remove tiles to get the microwave out…how are you going to install the tile backsplash again so it matches and looks original?
You may also want to have your installer leave a small gap between the countertop and the tile. If you decide to replace the countertop in the future due to damage or color preferences, this will prevent you from having to repair or replace the tile backsplash. If you leave the small gap, be sure to use a clear silicone caulk between the tile and the countertop to prevent water damage.
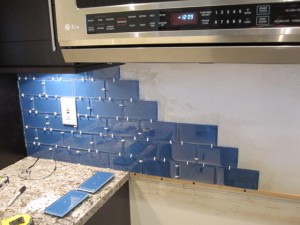
Grout Spacing: Typical grout spacing for a subway tile backsplash is 1/8″. Your installer should use the spacers as shown in the picture to keep the grout joints consistent throughout.
Hopefully we’ve answered all your questions about how to install a quality glass tile backsplash. Check out our main site for more information on how to save money as an owner-builder on kitchen remodeling.
8 Comments for How to Install a Glass Tile Backsplash
home builders Missouri | December 8, 2011 at 11:37 pm
Granite Countertops: Quality Considerations- Armchair Builder :: Blog :: Build, renovate, & repair your own home. Save money as an owner-builder. | December 12, 2011 at 4:23 am
[…] your outlets. Plan on spending the same square foot price as the main countertop. For my projects, tile has been slightly less expensive than granite slab backsplash with medium to high grade granite. […]
The Best of Armchair Builder, 2011!- Armchair Builder :: Blog :: Build, renovate, & repair your own home. Save money as an owner-builder. | January 25, 2012 at 1:07 pm
[…] Glass Subway Tile Backsplash Installation Tips One of the easiest ways to give your kitchen a new, custom look is to install a glass tile backsplash. For our new kitchen, we have decided to use a horizontal 3″x6″ glass subway tile to provide a clean, modern look. Let’s take a look at how you go about having a quality glass subway tile backsplash installed that will last for years to come. […]
Installing Tile Backsplash | homeimprovementwise.com | February 29, 2012 at 9:50 am
[…] Glass Subway Tile Backsplash Installation Tips- Armchair Builder … […]
Should I Update My Home Before Selling?- Armchair Builder :: Blog :: Build, renovate, & repair your own home. Save money as an owner-builder. | April 2, 2012 at 12:54 pm
[…] you want. Here are some resources for updating…Kitchen Remodel, Tile Floor Installation, Kitchen Backsplash. For some ideas on getting a great deal on your next property, check out our post titled Take […]
Homepage | July 15, 2012 at 8:54 pm
… [Trackback]…
[…] There you will find 82068 more Infos: blog.armchairbuilder.com/1503/glass-subway-tile-backsplash-installation-tips/ […]…


This is a very informative article. Many homeowners that are planning to remodel their kitchen by having subway tiles will surely benefit from these great tips.