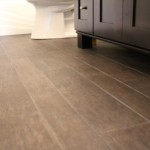
When hiring a tile subcontractor, certain items are a must to ensure a quality finished product that will last for years. These are fresh in my mind as I just finished a kitchen renovation. We installed a gorgeous 18″ square limestone with coral. Here is my checklist for a quality installation…
- Underlayment – Make certain the material below the tile is solid, whether it’s plywood or a cement product. You don’t want any movement that will crack or loosen the tiles.
- Layout – The layout is king! Insist your installer go over with you the location of tiles prior to starting. Make sure you will have full tiles in the main traffic areas and avoid partial tiles in highly visible areas (whenever possible). Make sure the subcontractor uses a laser level to shoot the underlayment…he/she can then adjust the amount of thinset to level out the floor…this is even more critical for the large tiles that are currently in style.
- Check Quality of each Stone – When using natural stone, make sure you or your installer reviews each piece for consistent quality. In my kitchen renovation, we had to set aside five percent of the material due to quality issues like voids, micro-cracks, chips…etc. In our case, some of the pieces could be salvaged by cutting the bad sections out.
- Grout Spacing – Stones can vary in size. For our installation, some tiles varied by 1/16″ in one length or the other. This can throw off the lines in the floor if you don’t have enough space between tiles. Basically, the larger tiles will encroach into the grout joint and you won’t see it. So we used 1/8″ grout joints to help with this. Of course you can insist your installer check each tile and cut the big ones down…but this can require time and money.
- Level and square. We already talked about having your installer use a level to check the subfloor prior to starting. Also make them aware that you expect the floor to be level and square. The square requirement can be tricky depending on how good the rough carpenter was on your home. (When building a new home, always do a thorough quality check to make sure all walls in tile locations are square) If the walls are out of square, this will show up in the tile. When laying out the floor, go over this with your installer…have him check to make sure you don’t have an issue…and if so, go over your options with him/her.
- Jamb Undercuts – If your new floor is the same thickness as the old this point is not necessary. However, most of the time you will need to undercut the door jambs and casing so the new stone or tile will fit neatly underneath. If your installer tries to cut the tiles around the jamb and casing, it will most likely look messy.
- Grout – Make sure your installer gets grout completely down into the space between the tiles. This will give you a much better installation with fewer problems down the road.
- Sealer – At a minimum, have your installer seal your grout for you. Look for the best sealer you can find so you can put off re-sealing anytime soon. If you use a stone tile, be sure to check on sealer options. For my kitchen, I used a penetrating sealer that actually seeps into the tile. I would sample a few different sealers on scrap material (and let them dry) before choosing. We didn’t want the tile to change color…we liked it natural. If you want to bring more color out of the stone, you can use a color enhancer…check with your local supplier.
- Protection – Don’t forget to put protections in place for your chair legs and anything else you may slide across the floor. Those round, sticky felt products at your local hardware store can help save the surface of your new floor.
- Floor transitions – insist that your installer make any floor transitions happen underneath the door slab. So, when the door is closed, you won’t be able to see the joint (from either side of the door). Also, make sure you include in your subcontract that the installer will finish off all transitions that butt up to the new floor.
If you are thinking of hiring a tile installer, go to our video, Bidding Out Work, to find out how to hire the best trades, for the best price.
5 Comments for Tile Installation
gify animowane | September 11, 2011 at 9:22 pm
śmieszne gify | September 12, 2011 at 9:10 pm
I really liked that article. You should write more about that topic.
Tile Underlayment Options- Armchair Builder :: Blog :: Build, renovate, & repair your own home. Save money as an owner-builder. | October 20, 2011 at 8:43 am
[…] of underlayment available so let’s go through each option and explore the associated costs. If you need more information about the complete tile installation project, check out our previous p… Be sure to discuss the information below with potential tile suppliers and/or installers and make […]
Should I Update My Home Before Selling?- Armchair Builder :: Blog :: Build, renovate, & repair your own home. Save money as an owner-builder. | November 30, 2011 at 8:33 am
[…] money and get what you want. Here are some resources for updating…Kitchen Remodel, Tile Floor Installation, Kitchen Backsplash. For some ideas on getting a great deal on your next property, check out our […]
Tile Backer Board Installation. Key steps for a quality installation.- Armchair Builder :: Blog :: Build, renovate, & repair your own home. Save money as an owner-builder. | July 18, 2012 at 8:04 am
[…] Tile Installation Article […]


The post you wrote is very nice.