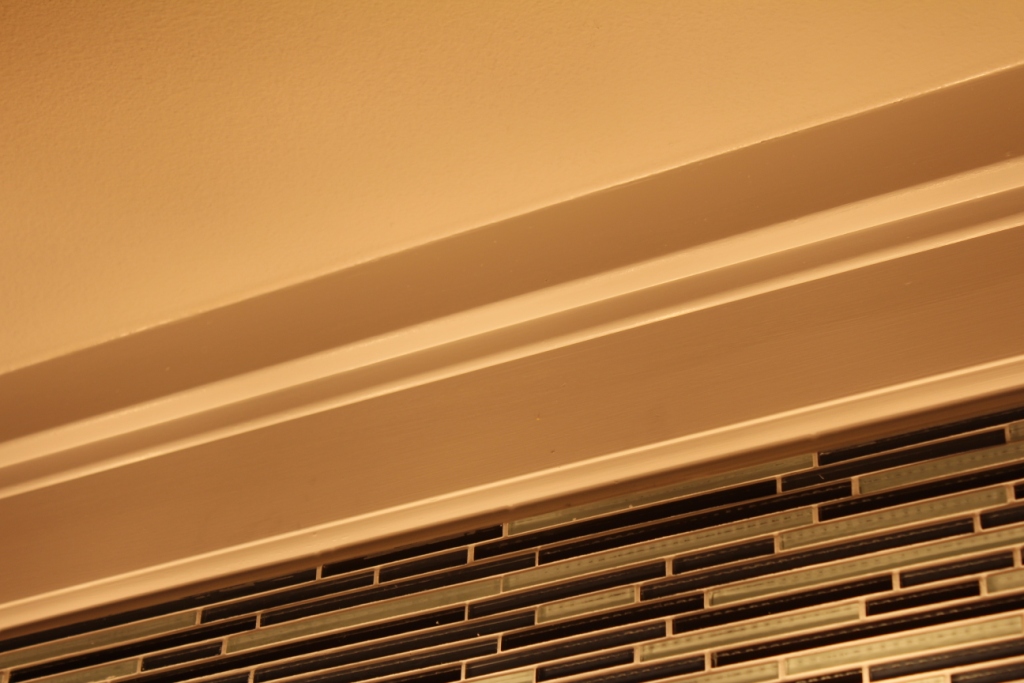
How would you like a few molding ideas to create a custom look in your home without spending a ton of money? You walk through model homes and see some really great things but aren’t sure how to duplicate what you see. Here we share with you a couple molding ideas that are great for DIY installation and will cost you less than $100.
Why so Inexpensive?
We installed the trim detail in the picture above in our latest bath remodel. Believe it or not, the cost was less than $50 for our 11′ x 5′ bathroom. There are a couple reasons this project is so inexpensive…
- We combine small peices of trim to create a larger, more custom look
- We use readily available, low cost materials…the cornerstone of all budget friendly molding ideas
- Because we used small pieces of trim, this installation is so easy it’s a “no brainer” for DIY installation
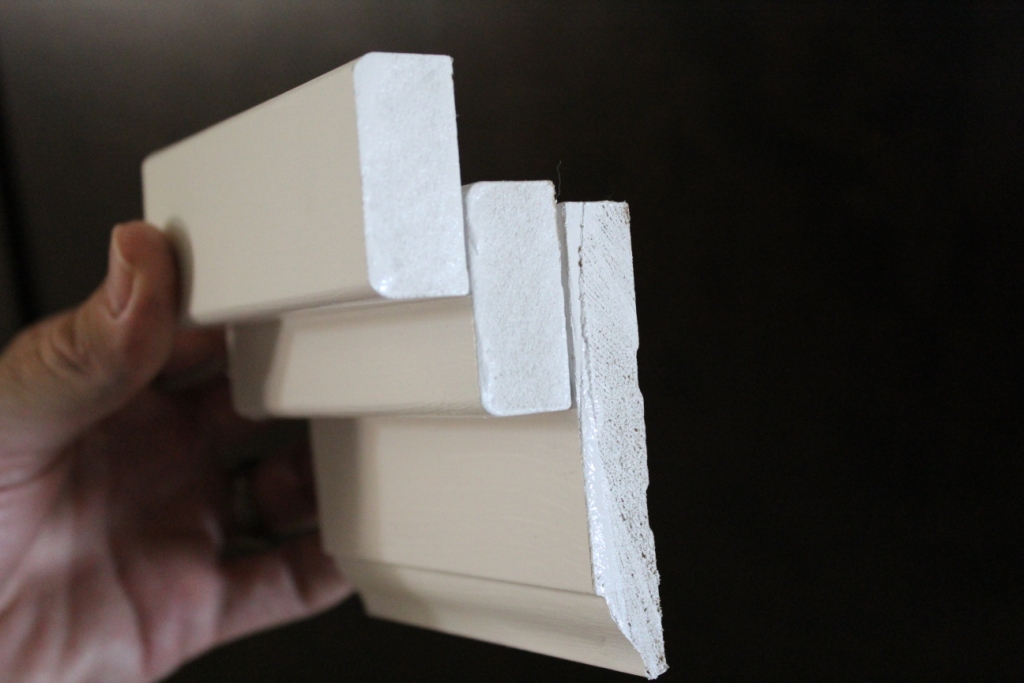
One of our favorite molding ideas for trim at the top of the wall is shown in the picture above. The first piece of trim is a three inch tall colonial base molding turned upside down on the wall. This is placed on the wall first leaving plenty of room for the remaining two pieces . We then install a 1×2 (actual dimensions are 1.5 inches tall by 3/4″ thick). Of course you don’t have to use these exact sizes. We chose these because of availability and price. The other nice cost saving feature for the trim we used…it came pre-primed to save time. The third piece of trim is another 1×2 layered on top as shown in the picture. Our actual installation for our bath remodel varied slightly from this as we wanted to fill in the area between the tile and the ceiling. That’s one of the great parts about this detail…it can be adjusted to meet your circumstances easily.
Molding Ideas for Even More Savings
- Use fingerjointed pine or MDF material whenever available. These are extremely low cost and since they are at the ceiling, they won’t be susceptible to damage from being bumped into.
- Typically smaller pieces of trim, in width and thickness, are easier to work with if you are inexperienced. This cuts down on waste from bad cuts.
- Paint all of the trim before installing. You will probably need to touch up after installing, but this will save you a bunch of time and effort. It’s much easier to paint on a flat surface while standing on the ground. Even if you hire a painter to do the work, cut down on the cost by having them paint before installing.
- Paint the ceiling and wall before installation. Anytime we can keep from having to cut-in paint we have saved time and effort.


