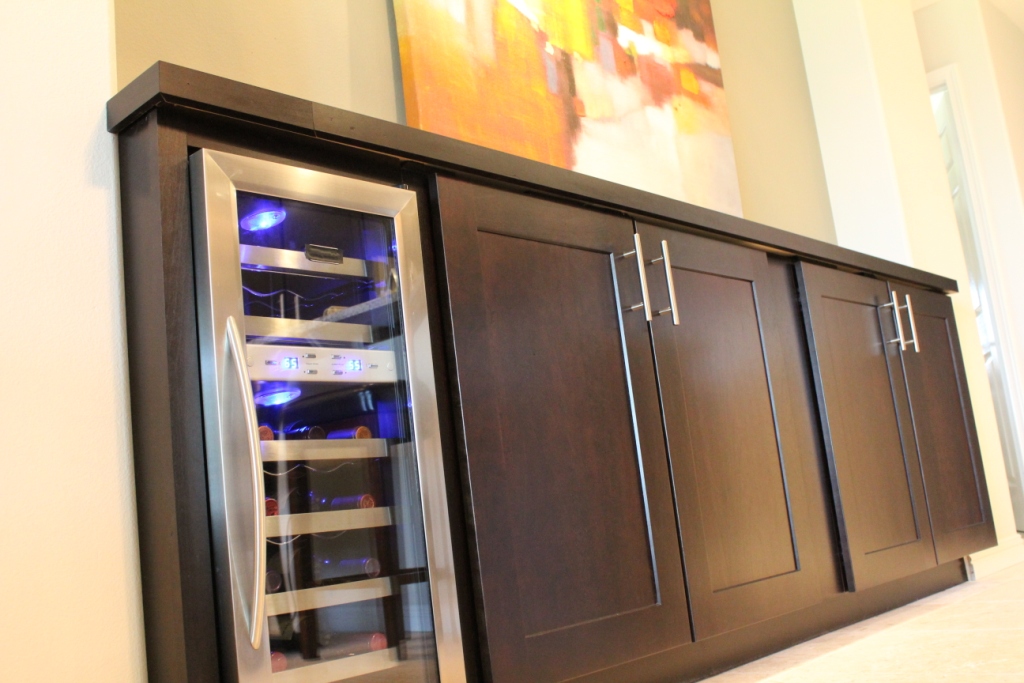
In our previous post, Wine Bar Installation, Part I, we discussed how to plan for your new project. We shared tips for saving money while getting a custom look to your new wine bar. Here we will share with you our basic steps for installation and show how we took a boring, unused space and made it into a functional, focal point.
Prep Before Install
Before you pull the trigger on your wine bar installation, you will want to do a little prep work.
- Remove Base Molding: These will all the cabinets to sit flush against the wall.
- Cut Hole for Recessed Wine Chiller: This should be done with extreme caution…You don’t want to injure yourself or damage critical elements inside the wall (i.e. wiring, plumbing, or structural components)
- Remove Cabinet Doors: This makes them lighter and easier to work with.
Recessed Wine Chiller
We talked about this in Part I, but it’s worth mentioning again here. You can minimize the space that your wine bar takes up by recessing your chiller into the wall. Most wine chillers are at least twenty inches deep in order to accommodate the typical wine bottle.
So a great place to recess your wine chiller into the wall is under stairs when the space isn’t being used for other purposes. Staircases are known for wasting space underneath them. So, if you can plan your new wine bar onto a stair wall, you might be able to recess the chiller back under the stairs to save floor area. Just make sure you don’t hurt the structural integrity of the stair wall supporting the stairs and be sure to follow the wine chiller manufacturer directions for proper ventilation.
For our latest wine chiller project, we utilized space in the laundry closet behind. This allowed us to use standard 12 inch deep wall cabinets for the main structure of the bar. By using standard cabinet sizes, you can save significant time and money over custom built cabinets.
Electrical
Obviously you will need to get power to your new wine chiller. We used an existing outlet on the wall adjacent to the chiller. By using a hole saw to cut a whole in the side of the cabinet, we were able to bring the plug into the cabinet. This allows us to unplug the wine chiller without removing it. If you don’t have an existing outlet nearby, you will need to run one to the location. Check with the wine chiller manufacturer product specifications to see what the wiring requirements will be.
Build Toe Kick
After getting our opening cut for the wine chiller, we were ready to start the actual bar installation. In order to make our cabinets look like the rest of the kitchen, we used a standard toe kick underneath. Remember, we used wall cabinets that don’t come with a toe kick. And because we had full overlay cabinet doors, we wanted to lift the cabinets off the floor so the doors easily cleared the flooring. So to build our toe kick, we used typical 2×4 studs. For a total of four dollars or so, we were able to purchase a couple 2×4’s to set the cabinets on.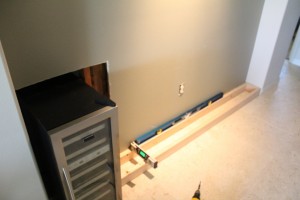 We built a box out of the 2×4’s that was 3.5 inches tall and 8.75 inches deep. This would give us about a 3 inch deep toe kick area under the cabinet to make them look like the other base cabinets in the kitchen. And by lifting the cabinets off the floor by 3.5 inches, our countertop would end up being just under the typical 36 inch height. The unfinished face of the 2×4’s are finished off by gluing a thin toe kick material purchased from the cabinet supplier onto the framing. You may need to cut the material down to fit the space.
Cabinet Installation
The cabinets are installed the same way you would hang typical wall cabinets. We started in the corner opposite the wine chiller. Our installation went like this…
- Install Right Cabinet: Set the cabinet on top of the toe kick frame. Get the cabinet level and plumb and secure it into the studs with three inch cabinet screws.
- Install Middle Filler: Our design used fillers to allow us to use standard sized cabinets, so we installed that next. We apply glue to the edge of the filler facing the cabinet, clamp it into place, drill three pilot holes and screw through the cabinet style and into the filler.
- Install left cabinet: This is the same process as the first cabinet.
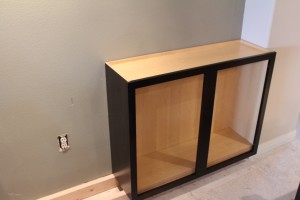
- Install filler to the right of the wine chiller. Carefully measure the size you need prior to cutting the filler. Remember, most wine chillers have drawers that slide out with the wine bottles. In order to get those drawers to come out, the door typically needs to open at least 90 degrees. So make sure the fillers/trim next to the chiller don’t encroach so far that they keep the door and drawers from working properly.
End Panel Installation
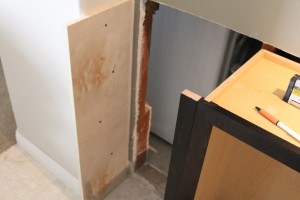
The end panel will cover up the side of the wine chiller providing a nice, custom look. Most cabinet manufacturers have end panels you can purchase that come pre-assembled. For our wine bar, we decided to use leftover materials to build our own. Basically we used a piece of plywood, toe kick material, and a filler strip to make the end panel. Here is how we did it…
- Cut the Plywood to fit: Make sure the plywood is the correct height as it will support the countertop when finished. So be sure the top edge will be exactly at the height of the underside edge of the countertop when installed.
- Secure Plywood – The plywood panel will provide the structure for the end panel and the countertop above. So, you want to make sure it is secured into place. You don’t want traffic walking by to knock the panel out of place. We used glue and screws to secure the panel into the adjacent column. If you don’t have a column (or wall) next to the panel, you will need to use a cleat at the floor and wall to secure it into place.
- Finish Edge: We used a leftover piece of toe kick material to finish off the side of the end panel. We cut it to fit and glued it to the plywood face.
- Front Edge: The front edge of the end panel also needs to be finished off. The best way to do this is with a filler strip cut to fit the space and glued and nailed into the front plywood edge.
Countertop Installation
In order to save some big money and create a unique look, we created a glass top with stained trim for our wine bar. The project is relatively easy to do and can save hundreds of dollars. Here’s how we did it…
- Plywood: Using plywood with a birch finished surface, we cut the panels to fit the space. Be sure to consider the overhang you want when cutting the material. We wanted the finished top to have a one inch overhang past the cabinet doors.
- Stain: We found a stain that matched the cabinets and applied two coats to get a similar tone. But before applying the stain, we had to fill the seam where the two plywood panels meet. Our space was too large to use one piece of plywood…if you can use one piece, this is a better way to go. Following the manufacturers directions we applied the filler and then the stain. As always you want to cover all adjacent surfaces to protect them. Drop cloths and tape should help with this.
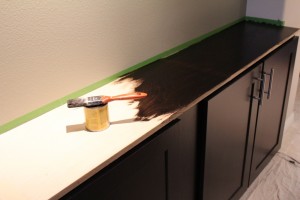
- Trim: We purchased trim from the cabinet supplier for the countertop edge. Using a miter saw, trim nailer, and glue, we installed the trim to cover the edge of the plywood and the future glass top surface. You want to hold the trim up high enough to cover the edge of the glass. This will help protect and hold the glass in place.

