How to Build a Home, Step 35
After framing your new dream home, it’s time to start the plumbing rough-in. This step in our how to build a home series of articles covers the schedule, preparation, and quality checks for the plumbing. There are some key items that professional builders use to get a quality installation and prevent leaks. Here we will discuss the action items that owner builders need to take to ensure the plumbing contractor gets the job done right.
Schedule for Plumbing Rough-in
Typically, the plumbing rough-in starts just after the rough framing has been completed. Our schedule has the roofing contractor starting the day before the plumber in order to get the house dried in. The reason being, it can be difficult to glue pipes together if rain is dripping down through the roof sheathing. Just remember, if the roofing contractor leaves before the plumbing vents are run to the roof, the plumber will need to install the flashing (or you will need to pay the roofing contractor to come back).
Preparation
It’s extremely important to make sure all rough framing is complete prior to sending your plumbing contractor into the home. If for some reason a wall is off or a stud needs to be repaired later, it can be expensive and time consuming to have the plumber come back to move the plumbing prior to making the framing correction.
You will want to make sure your plumbing contractor has all of the product specifications, plans, and cabinet layouts before starting. Most professional general contractors will place all of these documents in a safe place in the home for all of the trade contractors to reference. The kitchen windows or doors are perfect for taping all important documents up for viewing. This lets the actual workers compare the colors, product numbers, and layouts to their information to make sure everything is correct before installation. You don’t want a beige tub installed in your new dream bathroom when your interior design calls for white.
Build your own small custom home for $165k. Click for details.
It’s also important to give the HVAC (heating, ventilation and air conditioning) installer a call to remind them the plumbing is starting. Most good HVAC companies will want to go over the layout with the plumber before starting the plumbing rough-in to make certain there is space for both ductwork and drain pipe. This is extremely important for homes with open floor plans where there are limited walls for running mechanicals.
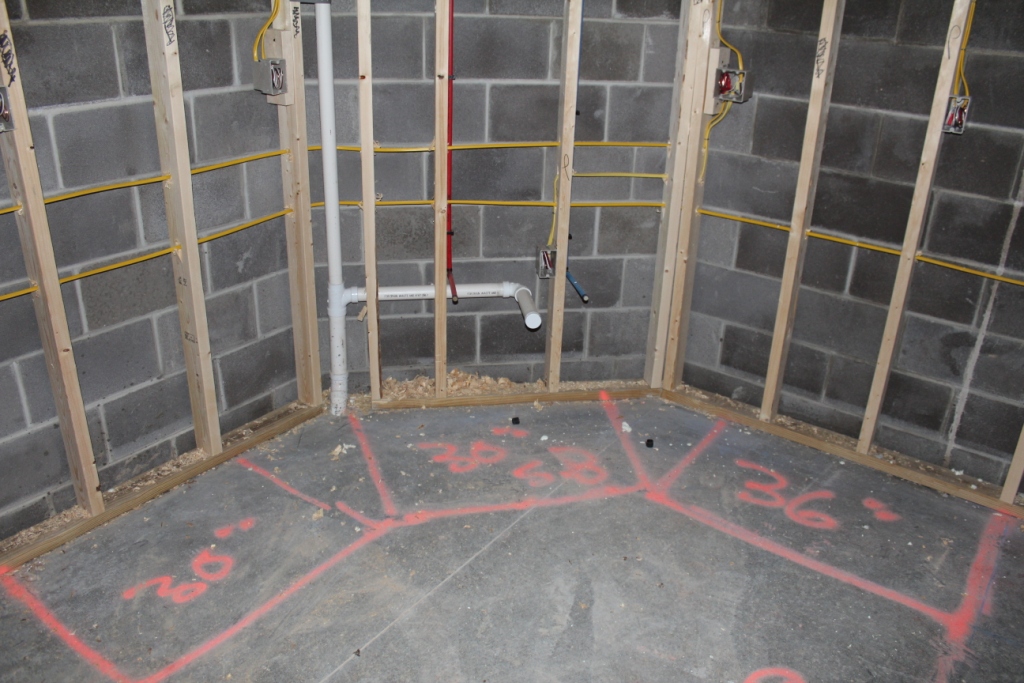
You, or your builder consultant, will also want to mark the locations of all cabinets on the floor before the plumbing rough-in. This will tell the plumber where to run gas and water lines. It’s never fun to get all the way through rough inspections, insulation and drywall to then find out the kitchen sink plumbing is in the wrong spot.
Quality Checks
Here are some of the most important general contractor/owner builder quality checks for the plumbing rough-in.
- Review all trusses, beams, and girders to make sure nothing was cut or notched
- Joists/I-Joists – Make sure these were cut and notched per the manufacturer recommendation or code requirements. Check out this article on drilling joists for more information on what is allowed.
- Check drains and supply lines were installed per plan
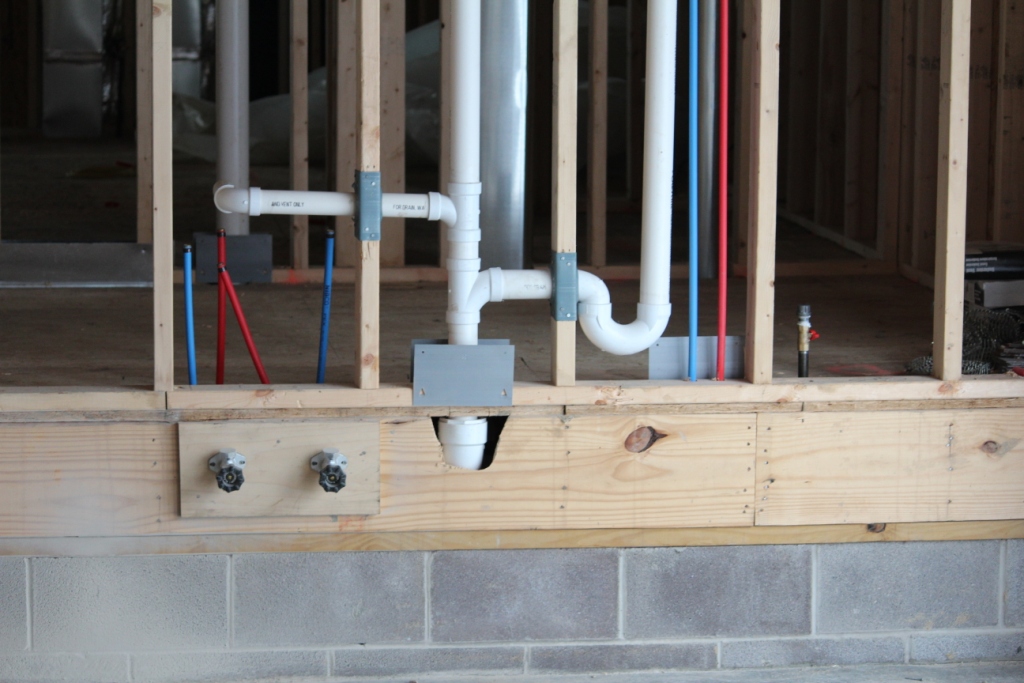
- Nail Plates – Review to make certain the metal protector plates are installed where supply lines pass through studs/plates
- Toilet Flanges – Check measurements to verify toilet will be centered in opening
- Verify that plumber has performed all pressure testing required and passed local municipal inspection (or the inspection is called in)
- Review vent flashings on roof to make sure they are all installed
- Cold Climates – Check to make sure no water supply lines were installed in exterior walls
Easier Repairs
It can be difficult to find water supply lines after insulation and drywall are installed. One builder trick to make this easier is to mark the locations on the floor. With spray paint or marker, water lines and drains can be identified at the plumbing rough-in on the subfloor for future reference. These marks will help drywall trades and trim carpenters avoid these lines when nailing or screwing into the wall. And if there is a problem before flooring goes down, you will know exactly where the lines are in the wall for repair.
Have you been following our blog series on How to Build a Home? If you’d like to see all the steps we’ve covered so far, type how to build a home into the search box in the top right corner of this page. And if you are thinking of building your own home, stop by our resources page for some one-of-a-kind resources to help you get it done.


