With a carefully thought out kitchen design you can create a fully functional, custom look at an affordable price. For this small kitchen, we needed to maximize the use of the space to make things work. In order to accomplish this, we pulled out all the secrets from the kitchen design books. Here we will share with you some of the details that help make our kitchen a little more functional.
We wanted under cabinet lighting to provide task lighting on the countertops in our kitchen design. In order to create a custom look, we used a light rail and cabinet skin to cover the underside of the cabinets, lights and wires. A light rail is a piece of trim that attaches to the bottom of the wall cabinets to help hide the under cabinet lights. The skin is basically a 1/8″ thick piece of plywood with the same finish as the cabinets. We installed the light rail at the time of cabinet installation. Then, we had our electrician rough in the wires for the undercabinet lighting. We then had our carpenter cut the cabinet skin to fit the underside of the cabinets and cut with a hole saw the locations for the puck lighting. The low voltage wires are then pulled through the holes and the skin is glued and nailed in place. This kitchen design creates a custom look as the underside of the wall cabinets are now finished off (they typically come unfinished).
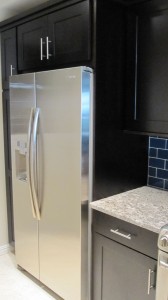
Another great way to create a custom look in your kitchen design is to enclose the refrigerator. If you have a standard freestanding refrigerator (as opposed to an expensive built-in model), make sure you check the manufacturer recommendations for proper clearance around the unit for air flow. For our refrigerator, we needed to leave a 1″ gap at the top and 1/4″ on each side. We installed a full 24″ deep refrigerator cabinet above the unit and then used an end panel to hide the side of the refrigerator. Be sure to include the refrigerator door hinges when calculating the height to install the wall cabinet above (and add in flooring thickness if you haven’t already installed the floor). Also make sure your refrigerator doors will open a minimum of 90 degrees in your kitchen design so the drawers fully open. If you are buying a new refrigerator, consider a cabinet depth style. This will help you create the look we have here. A cabinet depth model is a little more expensive, but it will give your new kitchen design a custom look.
Roll out trays are a great way to make your deep base cabinets easier to use. If you decide to go this route, make sure you allow clearance for the cabinet door to open past 90 degrees so roll out trays clear. When figuring this clearance, be sure to take into consideration the cabinet hardware. If the cabinet is next to a wall, the hardware may keep the door from opening all the way…so you will need to add a filler strip at the wall to provide clearance (a filler strip is just a piece of wood finished the same as the cabinets and typically the same thickness at the cabinet face). If you decide not to go with roll outs but you want full overlay doors on your new cabinets (where the doors and drawer fronts are the same width as the cabinet), add fillers between the end cabinets and walls so the drawers will open without rubbing the wall.
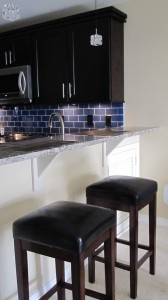
Another cool way to add functionality to your kitchen design with very little cost is to add a bar top. Typical bar height for regular bar stools is around 42″ off the floor. Again, make sure to include the flooring thickness into your kitchen design. You will want to include a full backsplash in this location with cutouts for your electrical outlets. A standard 4″ tall backsplash will not look good due to the outlets. For the bar top in your kitchen design, be sure to figure a minimum of 15″ wide counter. We used 18″ to allow plenty of room to eat here…as well as drink of course.
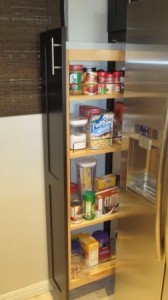
To maximize the useful storage in your new kitchen design, check with your manufacturer to determine the different options available. We decided to use a roll out pantry cabinet to make use of a small corner. If we hadn’t used the roll out, we would have a deep cabinet with little access to reach the items in the back. Another option we chose to add to our kitchen design…the baking pan divider cabinet. Rather than stack these under our range as many people do (the bottom of our range is actually a second oven), we added a 12″ base cabinet with the dividers into the kitchen design.
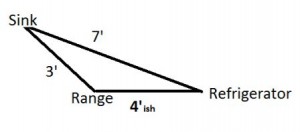
One of the most basic kitchen design rules is to provide a triangle between the refrigerator, sink and range. The closer you keep these items together, the better your layout works. At least I am told this by people that actually cook. If you add up the legs of the triangle and they are less than 26′, you are in business. For your dishwasher, make sure it’s within 36″ of your sink. This helps with dishwasher loading and shortens the distance your dishwasher needs to pump the waste water to the sink drain.
One other important kitchen design criteria to keep in mind when putting together your kitchen…be sure to leave 36″ clearance in front of all cabinets for handicap access. You never know when you might need this…my sister broke her ankle last year and needed a wheelchair. Something to think about.
These are just a few of the design elements we used to add functionality and customization to small kitchen design. These should give you a good start on your new kitchen remodel. Your cabinet supplier should be able to create a complete layout with elevation and plan drawings at no cost to you. Also ask if they can provide a touch up kit for any issues that come up after shipping or in the future.
