Roof Installation with Asphalt Shingles
0 Comments | Posted by armchairbuilder in Build Your Own Home, Owner-Builder
How to Build a Home, Step 34
Once your carpenter is finished framing your home, it’s time for the roof installation. This is step 34 in our blog series on how to build a home. If you are interested in seeing the previous steps, type how to build a home into the search box in the upper right hand corner of this page. So today’s step covers the important items for owner builders to consider for the roof installation activity. We will share with you builder tips for getting a quality roof installed.
Frame Quality Check
There are some items you will want to check as the owner builder before your roofing contractor starts. These are items that directly affect the quality of the roof installation so they should be completed prior to stocking the roof shingles.
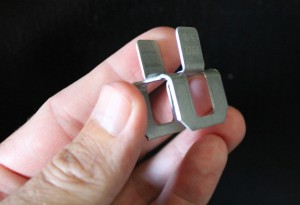
- H-clips installed – H-clips are metal clips that are centered between two roof trusses and support the roof sheathing edges to prevent sagging (see photo below to see an H-clip). These should be installed at every roof sheathing seam between trusses (or some other method of support should be used).
- Trim Tacked Into Place – Any trim on the home that extends down to the roof surface should be temporarily tacked in place to allow the roofing contractor to install flashing underneath. Once nailed into place, there should be a one inch gap between wood trim and the roof surface to avoid moisture damage
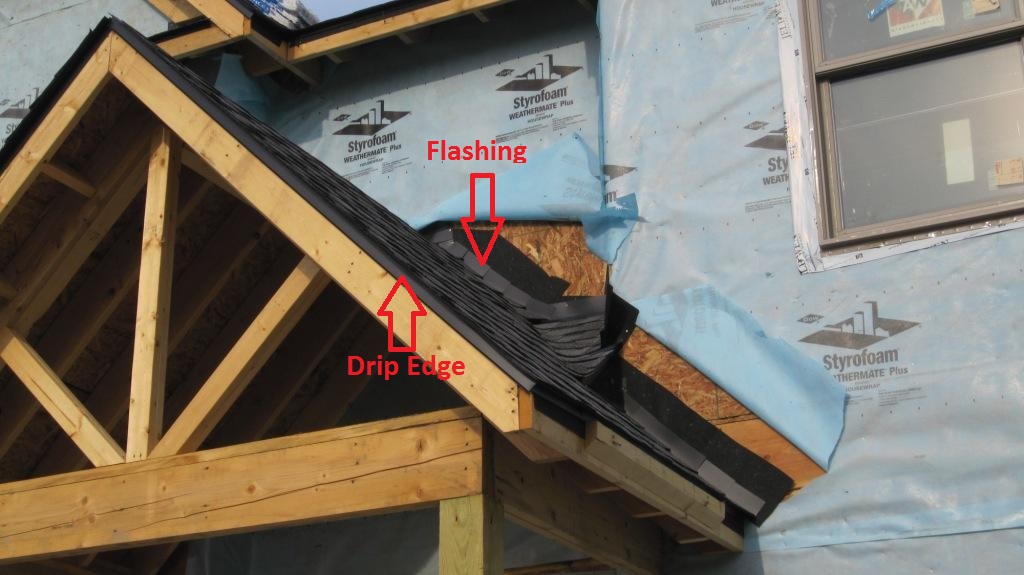
- House Wrap Loose at Roof – Make sure the carpenter leaves the house wrap loose for the last six inches of wall adjacent to the roof surface. This will allow the roofer to install flashing up underneath and tape the top directly to the wall sheathing. Then the house wrap will be secured to lap over top of the new flashing…so any water that gets behind the siding will run down the house wrap and out over top of the flashing and onto the roof surface.
- Ridge Cuts – If you are installing ridge vents, the roof sheathing should have been cut back one inch on either side of the ridge. Make sure the roof sheathing at the ridge is a minimum of 12 inches wide. This allows for a proper nailing surface to secure the ridge vent to. If there is less than 12 inches of sheathing, have your carpenter add 2×4 blocking underneath in the attic for support.
- Fascia/Gutter Boards – Make sure all fascia or gutter boards are installed. This will allow the roofing contractor to install drip edge at the roof edge.
- Chimney Cricket – Make sure your carpenter has installed the cricket at the chimney to direct water away.
One tip for identifying any potential problems is to have your roofing contractor come out to the house the day before he/she is scheduled. This will allow them to do a walk around and point out any potential framing problems.
Roof Installation Quality Check
Here are the major items builders look for on a quality roof installation…
- Flashing is installed up underneath house wrap (see top photo)
- Rubber Underlayment (Ice and Water Shield or equivalent) is installed at eaves in cold climates to prevent ice dam leaks – check with your local building department for width required at eaves
- Drip Edge is installed at all roof edges to keep water from getting up under shingles (see top photo)
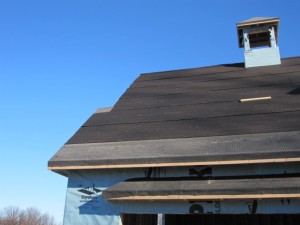
- Underlayment Installed in field of the roof per local code
- Shingles are nailed per the manufacturer recommendations and per local code requirements
For roof installation in high wind zones, the following quality items apply…
- Each shingle should have a minimum of 6 fasteners, preferably nails and not staples (none exposed)
- Waterproof underlayment should be installed underneath the shingles
- First course of shingles should be sealed to the starter strip with roof cement
- If within 3000 feet of salt water, the nails should be hot dipped galvanized or stainless steel
- Kickout flashing (a.k.a. diverter flashing) is installed anywhere a roof and wall intersect to direct roof water away from siding
These tips should help you avoid roof installation problems on your new dream home. Keep in mind, asphalt shingle roof installation on pitches lower than 4/12 is not recommended. It can be done, but proper precautions must be put in place to prevent leaks. Are you planning on building your own home? Have you seen our latest video on the savings for owner builders today? If you need help getting your existing roof replaced, check out our Roof Replacement Bid Package at the Armchair Builder ESTORE.


