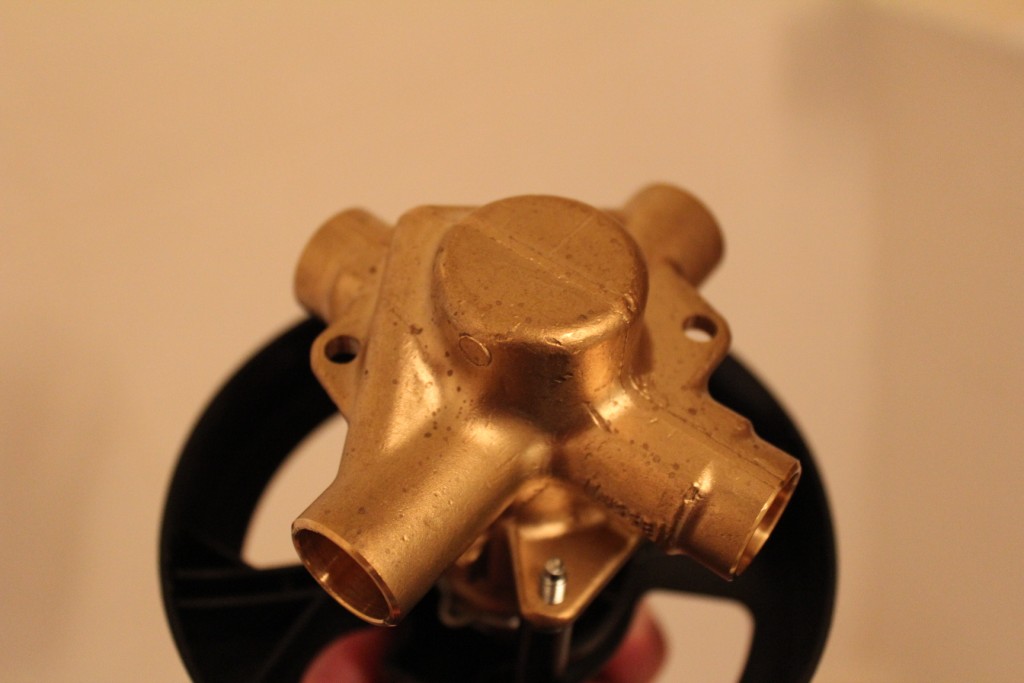
Shower valve replacement can be a messy process. No, we are not talking about replacing a shower cartridge…we are talking about replacing the whole valve that’s inside the wall. We just produced a video with some tips to save you time and effort when tackling this project. Let’s take a look.
When Shower Valve Replacement is Necessary
If you are thinking of replacing your existing shower (or tub/shower) faucet with a new style and manufacturer, chances are you will need to replace the valve inside the wall. We just finished up a new shower remodel and decided to do a complete shower valve replacement while we had easy access. The existing valve in our project was thirteen years old…not exactly a dinosaur, but something that can go bad. Why not replace it when we have easy access? While we had the shower walls stripped down to the studs, we got the job done.
Quality Tips
- Give your plumber the thickness of the cement backer board you will be using along with the thickness of the finish materials. Because materials can vary in thickness from 1/8″ to 1″, you need to tell the plumber how thick the tile or slabs (marble or granite…etc.) will be in order to set the depth of the valve properly. Once the new tile or granite slabs are installed in the shower, we want the final trim piece that covers the valve to fit snugly in place.
- Cut a large enough access hole to be able to properly replace the valve. This is typically a minimum opening size of 12″ by 12″. If you don’t want to replace the existing tile (or other shower wall finish material), check to see if you have access from behind the wall. You can save yourself some time and drywall repair by using this tip…1) remove the valve trim cover 2) Use a thin trim nail centered behind the valve and gently push it through the wall. 3) find the nail on the other side of the wall and neatly cut your access panel for your shower valve replacement from behind.
- A propane torch is the most common method for joining copper pipe (assuming you have copper). Ask your plumber if he/she has a compression tool instead. This tool works with fittings equipped with “O” rings to seal the joints. Using a propane torch in a shower valve replacement next to combustible materials is possible with the proper technique. However, it’s always better to remove the flame and fire hazard when possible. If you decide to go the DIY route for this project, you might want to rent the compression tool shown below. These babies sell for about $2000, so it’s probably not something you’ll want to buy. The ironic thing is…if you can afford to buy this tool, you probably would just call a plumber.
The Easy Alternative
If you don’t want to go to all the trouble above, an easier way to get a new look to your shower or tub/shower faucet is to just replace the trim. The trim is the shiny stuff you see on the outside of the wall. Most manufacturers have replacement trim kits that fit old valves. Our project had the Moen posi-temp valve. So, if we had wanted to leave the existing valve in place we could have. If you decide to keep your old valve, find out which manufacturer made the valve and determine the valve type. You will want this information when you go to purchase a compatible trim kit. If you think this is the route you want to go, check out our video covering the installation of a new tub and shower faucet trim kit. Check out our newest video if you still want to go with a full shower valve replacement.


