Have you ever tried hanging a picture over a bowed wall or a wall with a hump in it? Or maybe you’ve tried to install cabinets over a wall with a bowed stud? It can really be a challenge to get the cabinets to look good when the wall is less than perfect. Most of these problems are created by a bowed stud within the wall. So how can you fix these problems when they occur and, better yet, how can you prevent them from happening in your new building projects?
Drywall Fix
When the wall is bowed from a twisted or bowed stud, it’s sometimes possible to make a repair by working on the drywall surface. In some cases you can feather out a hump in a wall with extra drywall joint compound to make it less noticeable. This takes some skill, so you need someone who’s good with drywall finishing tools. Another option is to shave off the high spot in the drywall. These can work with minor bowed studs.
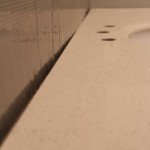
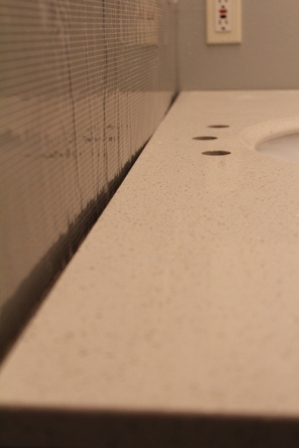
In our latest bath remodel, we had a bowed stud directly behind the new vanity top we were installing. If we had installed the new top up next to the bowed stud wall, we would’ve had a 3/8 inch gap between the wall and the vanity top at each end. In order to remove this gap, we cut out a piece of drywall out at the bowed stud in order to set the new vanity and top. By removing the 1/2 inch thickness of drywall, we were able to get the new vanity top flush with the wall. The pictures below show the progression from bowed stud to installed vanity top without gaps.
-

- After Repair

-
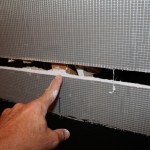
- Cut Drywall

-
- Vanity at Bowed Wall
Bowed Stud Prevention
When you are building a new home or addition, it’s better to prevent bowed studs altogether. You may not be able to eliminate them all, but you can drastically reduce the occurrence by adding a few quality checks. So, for your new building projects be sure to…
- Deliver lumber in a dry location, out of the rain and off the ground. The studs have a moisture content to them…don’t add to it. If you must place the lumber outside, cover it and put it up on blocks so it doesn’t make contact with the ground.
- Check for bowed stud at your frame quality check just after the carpenter finishes and once again just before insulation. (see video below for technique). Even if you don’t check every stud in the house, be sure to check those in the cabinet locations.
- Have your carpenter make a separate pile of bowed studs to make sure they don’t get installed and send them back to your supplier for a refund.
- You may also want to check the moisture content of your studs at delivery to make sure they are within an acceptable range.
Repairing Bowed Studs During Construction
Let’s say you find a bowed stud while building your new home or addition. What do you do now? If you haven’t run any plumbing or electrical through the stud, it’s easiest to just replace it with a new, straight stud. But if you already have electrical or plumbing run through the wall, it’s easier to fix it by bracing the bad stud. So for your non-load bearing walls with bowed studs, cut a notch in the bad stud and then install a horizontal 2×4 brace to pull the stud back to a straight position. Essentially, the two straight adjacent studs will help to hold the stud in an upright, straight position.
